Showing posts with label tips. Show all posts

Friday, January 28, 2011

Simple Steps to Get Super Sleek Hair

Super Sleek Hair

If you are tired of spending over thirty minutes blow-drying, teasing, and tweaking your hair every time you get out of the shower, then it might be time to try something new. By following these simple steps, you can test whether super sleek hair is right for you. In addition to looking like a supermodel, you will save some of that precious socializing time by cutting your styling minutes in half!

After washing your hair, it is important to thoroughly dry it with a towel that is not rough to the touch. This will allow you to remove a majority of the moisture from your hair without drying it out or damaging. Remember, the more moisture you remove from your hair using a towel rather than a blow-dryer, the less dry it will be. Secondly, you should apply your choice of hair cream. Mousses and gels will not give you the same effect, in fact, they will make your turn out completely differently, so be careful with your product choice.

Here comes the fun part! After you douse your hair in product, blow it try upside down. Be sure to use one hand to smooth your hair as it is drying, but do not over dry your hair! Going crazy with the blow-dryer can cause some serious damage and dryness. Lastly, if you’re hair is stubborn and likes to frizz up, you can smooth and shape the ends with your choice of round brush. This process is simple and will turn your sleep hair into super sleek hair!

Sunday, November 28, 2010

having soft, smooth, and shiny hair

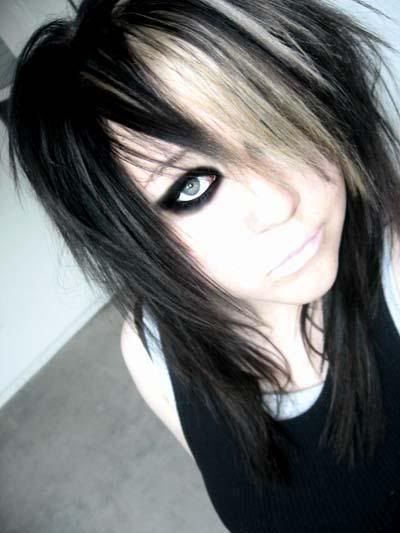
emo girl hair
Having soft, smooth, and shiny hair does not have to be difficult and expensive. Just follow these few simple steps and you will have beautiful and luxurious emo hair in no time.

First, brush your hair several times a day. Brushing helps remove the dirt, dust, and grime that get trapped in your hair. It also helps distribute the natural oils produced by the scalp, from the roots to the tips.

Shampoo your hair every other day and condition it everyday. Shampooing on a daily basis may strip off the natural oils that moisturize the hair. Conditioning it, on the other hand, restores lost moisture and keeps the natural oils in place.

Use cold water as much as possible when washing your hair. This seals the hair cuticles and locks the conditioner as close to the hair follicle as possible.

Give your hair a hot oil treatment once every two weeks. Mayonnaise or egg yolks can be used as an alternative to expensive salon treatments. Spread mayonnaise or egg yolks combined with olive oil all over your hair, concentrating on the ends. Cover your hair with a shower cap for 10-20 mins and then rinse well.

Eat lots of food rich in B-vitamins and proteins, like bananas, soybeans, avocados, eggs, grains, and red meat. The nutrients found in these food items are responsible for healthy and shiny hair.

Refrain from using heated styling tools and alcohol-based styling products as much as possible, as this can easily dry out your hair. If it cannot be avoided, use thermal styling tools and water-based styling products, which cause less damage to the hair.

Lastly, have your hair trimmed every six weeks to keep it in tip-top shape. This gets rid of the dry ends and keeps the rest of the hair looking good and healthy.

Saturday, November 27, 2010

Straighten Out Your Hair with Hair Iron


Straight Hair Tips - Winter 2008-2009

Within this article, we are going to tell you some tips on how to use the hair iron to straighten out your hair. Today, it seems that the hair iron is starting to emerge and become more popular than ever before. The hair iron is being used by women of ages. You should use the hair iron after you have cleaned your hair. It could be dangerous for you to use the hair iron before you clean your hair because of the grease and dirt that is in your hair could cause your hair to cook and be damaged.
This may seem like a no brainer, but we have heard stories of individuals doing this, you should never iron your hair with the iron you use to iron your clothes. If you do this, your hair is going to singe. You can cut the singed hair off, but we recommend you using a hair iron that is used for this purpose. You should first dry your hair for around fifteen minutes with a hair dryer, depending on the thickness of your hair, then continue with the drying process and use a comb at the same time. You should carefully comb your hair in order to get the curl out. Then in the end, no more than five minutes, you will use the hair iron at the ends of your hair. This is a safe way to straighten your hair and it will leave it shiny.
When you are blow drying your hair, we ask that you use cold air because hot air can damage the hair. Besides cold air is good for the hair and will leave it shinier and healthier looking. When blow drying your hair, you should always use a brush. Now you have it, your straight hair tips.

Sunday, May 16, 2010

Hacks to Make Firefox Faster than Google Chrome

Google Chrome has now eclipsed Mozilla Firefox in the speed category. However, I still use Firefox as my main web browser because it is still better than Chrome in certain areas.

But just recently, I tried a few tweaks that significantly improved the speed of Firefox making it a little bit snappier than the latest version of Google Chrome when loading webpages.

Here are some of the things that I did that helps make Firefox somewhat faster than Chrome:

1. Type about:config into the Firefox URL/address bar and hit ENTER. You will be warned that you might void your warranty if you change some advanced settings, but just go on and trust me :-)

2. Inside the Firefox configuration page, scroll down and look for the following entries:

network.http.pipelining
network.http.proxy.pipelining

Set their values to “true” by double-clicking each one of them.

3. Next up, find this entry:

network.http.pipelining.maxrequests

Double-click and set the value to "8".

4. Right-click anywhere inside the config page and select New --> Integer. Name it nglayout.initialpaint.delay and set the value to “0″.

5. Right-click anywhere inside the config page and select New --> Integer. Name it content.notify.interval and set the value to “500000″.

6. Right-click anywhere inside the config page and select New --> Boolean. Name it content.notify.ontimer and set the value to “true″.

7. Right-click anywhere inside the config page and select New --> Integer. Name it content.switch.threshold and set the value to “250000″.

8. Right-click anywhere inside the config page and select New --> Boolean. Name it content.interrupt.parsing and set the value to “false″.

That's about it. You should be able to notice the speed improvement immediately after applying the above tweaks.

Disabling Firefox addons that you don't use often, blocking flash content, and using a lightweight theme will also help speed up Firefox.

Source: JunAuza

Tuesday, April 27, 2010

The life-changing list of keyboard shortcuts for Windows users

There is always at least two ways of doing something on a Windows PC. If you've learnt by doing, rather than from a book, you probably only know one way. Watch your mother use a word processor one day -- I bet she uses File > Save rather than hitting Ctrl+S. What about you? Do you know your shortcuts?

Keyboard shortcuts are by far and away the best way to a) speed up your work flow and b) prevent RSI. The single worst thing you can do, as far as your wrist and elbow is concerned, is move your hand to the mouse. The best thing you can do is read this list of shortcuts and be amazed at what you can do with just a couple of keystrokes

Read more @ Downloadsquad

Saturday, December 20, 2008

Emo Makeup - How to Completing the Emo Look

Emo Makeup
Emo is usually associated with emotional rock music. To be emo, you have to understand what it really means. And maybe you already read all the how to's to became totally emo. You tested yourself and you found out that you enjoy sensitive, in some sense whiny music that is thoroughly emo. So you have an emo music taste, check. You have emo opinions, check. You perfected the emo hairstyle and emo wardrobe, check and check. Why not top it off with a totally emo face. While it may ostracize you from your non-emo friends, just think that you are doing this not because you just want to pose as an emo but because this is what you are. Here are some simple steps in doing emo makeup.

Emo style make up for boys and girls

You will need:
• Moisturizer
• Foundation
• Eye shadow
• Eye liner (liquid or pencil)
• Mascara
• Chap stick or light lipstick tones
• Loose powder (shade one tone lighter than your actual skin tone)
Emo Makeup
Here are the instructions on how to apply:

1. Note that you need to have this look for the entire day. For the make up to stick, apply moisturizer on your face and neck. Make sure you apply it thoroughly as we do not want to have a patchy looking face. Use moisturizers that have sun block in them so as to further boost the pale face.

2. Emo make up highly rests on the fact that you look pale. However, using foundation a tone lighter that your actual color will look unutterably silly especially in pictures so your best bet is to use same color foundation on your face but we will slightly lighten it with loose powder later. Apply the foundation on your face and blend it to your neck down. If your top slightly shows some part of the chest area, better use foundation to cover that area as well.
Emo
3. Some say that it is best to place the eye liner before the shadow but that somehow looks messy so it is advisable to dab on some shadow first. If you are a guy, you can skip this step entirely or stick to black or grey. If you are a girl, you can use other colors, from black, grey, pink, red, purple, green, whatever you fancy. Do not overdo it. Best to dab the eye shadow until the inner lid only.
emo
4. Remove excess shadow on the base of the lids by brushing it with a blush on applicator or a Q-tip. If you are a beginner, use a soft black eye liner to line the upper lid and the lower, making sure you dab it from the inner part to the outer. Also, stick close to the lash line when doing this. If you are a bit more experienced in putting make upon, you can use the liquid liner.

5. Apply the loose powder to sort of seal the makeup together. Sort of like the glue for everything.

6. Apply two coats of black mascara, making sure not to clump the lashes together.

7. Finish off with an application of pale lipstick or if you are a guy, you can do with just lip balm.
emos
Voila! You now have the dark, angst filled emo makeup. Make sure you bring some of these cosmetics in your bag as you may have to do touch ups at the middle of the day. Just a rule of thumb, never, ever over do it.

Simone is a cosmetic makeup devotee and has written many cosmetic related articles to help women look stunningly beautiful the natural way.
Emo Makeup
emoBy Simon Mann

Monday, October 6, 2008

Emo makeup tutorial

Emo makeup tutorial
The 9 easy steps to achieve a perfect 'emo makeup' that will give boost your self confidence and you will start dating all the emo chicks from your city...at once, guaranteed...Well, not really, but this is a good tutorial nevertheless.
Starts with laying out all the tools.
  1. Moistureizer on a clean face, the moisturizer being MAC's Strobe Cream in this instance (the pot is just a sample, that I got. I think its time for a larger tube now).
  2. Primer over the moisturizer (thick), many primers come in a small pot or something mine happens to come in a little tube that has a wand not that much unlike lip-gloss. This Urban Decay primer is the only non MAC product I use.
  3. Base shadow, I used Nocturnelle with a 242 applicator brush. The shadow should go over the entire lid up to the crease.Dark areas on the inner and outer areas of the lid. I used my 242 again with Signed and Sealed eye shadow.
  4. Now the defining color in this case being Swish. Applied once more with the 242. The defining color should be applied in a sort of T shape going from the middle of the lid where there is just base up into the crease.
  5. Now blend these two with a 217, so as to meld or smooth out the lines.
  6. Now add the blending color with the 242 which in this case is Vapour. A very light, very sparkly pink. Each color starting with the defining color is begging to move up the eyes towards the brow. This blending color should be right below the brow.
  7. Mascara. I like to do mine now so that I can work the liner into it later on. I like to apply mascara first from the bottom of the upper lashes at the base and then work on the top to plump the up. As for the bottom lashes just stick some on them, they 're a bugger to define. You 'll probably get a little here and there around your eyes, I like to use a Q-Tip with a bit of moistureizer on the tip to remove it after its dried.
  8. Liner I like to use a liquid liner by MAC called Fluidline (Blacktrack) and a 266 brush to apply it. I like to apply it on my upper and and lower water lines or inner lid.
  9. Any foundations or blushes. I used a blush that sslightly darker than my skin tone to define my jaw.

emo makeup

Wednesday, October 1, 2008

Tips on how to do Emo Hairstyles

Emo hairstyle for girls
Emo Hairstyles
Cool emo guys hairstyle
Emo Hairstyles
Emo haircuts is that hot these days, guys and girls do love emo. They allow you to have fun, be creative and unique. An Emo hairstyle treats your hair like a canvas; you have artistic freedom to express who you are, to show off your personal style almost like an art form.
Emo girls haircuts
Emo Hairstyles
How To Style Emo Hairstyles
It is easy to form your Emo hairstyle into spikes or a funky shag.
Here are the simple steps:
  • Start with wet hair
  • Use your fingers work a amount of gel through your hair
  • Form your hair into spikes or shape your shag the way you want it
  • Blow-dry your hair
  • If making spikes, add more gel as needed
  • Do not brush your hair out
  • Spray hair well with hairspray for hold.(tips from www.beauty-and-the-bath.com)
Cute hairstyle for emo girls
Emo Hairstyles
Cool emo boys hairstyle
Emo Hairstyles
more emo haircut styles here

Friday, August 22, 2008

Some Tylers' Haistyling Tips

As far as what i do to style it, for the old haircut (1st pic) I used to comb it all down and straighten it in front of my face, then comb it kind of over my right eye and with the other bang to he left side and re-straighten it in its new position (thick wavy hair doesn't like to cooperate) Then for spiking out the back when the mood struck me, i'd kind of run my fingers up the back of my head and pull out the water after a shower to sort of sudo-dry it in that position already, then when straightening came i'd straighten it straight up, and finally I'd add some texturizer and run my hands up through the back and pull out ward, we have a closet in my house where you can see behind you so i'd usually use that to check for missed spots, don't add too much or it'll fall down, then usually once i got it staying nice and up I'd use the left over Texturizer on my hair to smooth it out and kind of hold it in place, my hair is thick so i'd basically pancake my bang between my palms and smoothen it out. then add a bit of hairspray to the back to hold it in place.
emoboy - hair
For my new hair I'm still experimenting The back is cut so I can spike it out But I've decided to go with wax to spike it which i'm still experimenting with (hence why i have no pictures of that) If you have really long hair i'd suggest some type of wax, simply because it has structure and seems less like lethal spikes than gel, and texturizer would barely help and you'd be holding everything up with hairspray alone otherwise. However it would be a similar idea, running your waxed fingers through you're hair and pulling outwards to make all of the hair stand up, for the front and sides, i pretty much just straighten them and add a bit of texturizer to hold them in place or Depp anti-frizz depending how staticy my hair is. For the bangs I simply straighten everything out and comb it into place so it blends nicely. once it grows a bit further i'll be able to do a fore head showing part but at the moment it doesn't work out to well.

So there is what i did for my old hair and what i do for my new haircut... theres actually a story behind my old haircut and the transitions it underwent before i got it as i liked it..then lobed half of it off lol.
via: emohairstyle.blogspot.com

Tuesday, July 22, 2008

Tips on Emo Hair Styling

Tips on Emo Hair Styling
Always use a protecting spray when blow drying your hair, this helps from damaging your hair. Then do a few more quick spray of the protector before straightening it. To really get a good hold use an extreme hold hair spray.

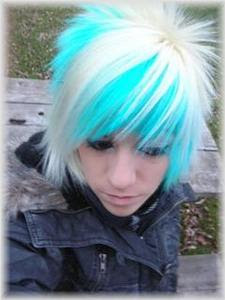
Colors are always a good way to make an emo style stand out. For those who can't color their hair, pick up some non-permanent hair color. It is temporary and will wash right out. You can find them in sprays and gels. All colors too- red, black, purple, blue, pink, green, teal, yellow, aqua, etc. You can always use more than one color!

The cut says it all. Short or long- it doesn't matter. Cut or have your hair cut in choppy, uneven layers. Side bangs are the bomb! Throwing some color in them will def. draw some attention. Using a razor will give you more texture- which is a great thing with emo hair.

If your hair is thick and you want it thinner to style better- use or have your stylist use a thinning sheer- this while thin out your hair (but not too much) and also give you texture.